Kombucha Second Fermentation with Fruit: Should You Leave the Fruit In?
When bottling my latest batch of kombucha, I stumbled upon some raspberries and nectarines in the fridge. Naturally, I thought they’d be…
When bottling my latest batch of kombucha, I stumbled upon some raspberries and nectarines in the fridge. Naturally, I thought they’d be perfect for flavoring this fresh batch during the second fermentation (F2). But then, a question popped into my head—a question I had when I first started brewing: Should I take the fruit out after carbonation, or can I leave it in the kombucha when I store it in the fridge?
If you’re new to kombucha brewing, this question makes a lot of sense. It’s easy to worry about whether the fruit will spoil or affect the flavor over time. However, the truth is that the acidic environment in kombucha preserves the fruit, much like pickling does. So, let’s dive into everything you need to know about kombucha second fermentation with fruit and whether you should leave the fruit in or strain it out.
Can You Leave Fruit in Kombucha After Second Fermentation?
Yes, you can leave the fruit in your kombucha after the second fermentation! Here’s why:
1. Acidic Environment Prevents Spoilage
Kombucha’s natural acidity (pH of 2.5-3.5) acts as a preservative. This acidic environment prevents the growth of harmful bacteria and mold, meaning your fruit won’t spoil like it might in a regular drink. The low pH is key to keeping the fruit fresh longer than you might expect.
2. Ongoing Fermentation Adds Preservation
During the second fermentation (F2), the kombucha’s yeast and bacteria continue to break down the sugars in the fruit, producing alcohol and organic acids. These byproducts further preserve the fruit, making it safe and tasty for an extended period.
3. Refrigeration Slows Fermentation
Once your kombucha reaches the desired carbonation, moving it to the fridge slows down the fermentation process. The cold temperature helps preserve both the kombucha and the fruit, although the fruit may soften over time.
4. Oxygen-Limited Environment
Sealing your bottles for the second fermentation creates an oxygen-limited environment. This lack of oxygen prevents the growth of spoilage organisms like mold, ensuring your fruit stays safe in the kombucha.
5. Natural Fruit Preservatives
Many fruits contain natural preservatives, such as citric acid, which help maintain their freshness. The fermentation process also consumes much of the sugar in the fruit, reducing the likelihood of spoilage.
Should You Strain the Fruit Out?
While it’s safe to leave the fruit in your kombucha bottles when refrigerating, some people prefer to strain it out. Here’s what to consider:
- Texture Changes: Over time, the fruit may become softer or lose some of its original flavor. If you prefer a cleaner texture, you might want to strain the fruit before storing the kombucha in the fridge.
- Flavor: Leaving the fruit in can intensify the flavor over time, especially for strong-flavored fruits like berries or citrus.
- Personal Preference: If you enjoy having fruit pieces in your drink, leave them in. If not, strain them out before refrigeration or just before drinking.
Fermenting Kombucha in a Larger Container for F2
Some brewers prefer to conduct the second fermentation in a larger container instead of bottling immediately after the first fermentation (F1). This method allows for deeper flavor infusion before transferring the kombucha to bottles for a third fermentation (F3). Here’s how it works and why you might want to try it:
How to Do F2 in a Larger Container
After completing F1, transfer your kombucha to a larger container (often the same size as your F1 vessel). Add your fruit and, optionally, fit the container with an airlock. This setup allows for a slower, more controlled fermentation, leading to richer flavors. Once you’re satisfied with the flavor, strain out the fruit and transfer the kombucha to bottles for F3, where carbonation is achieved.
Pros of F2 in a Larger Container:
- Enhanced Flavor Control: Since the fruit spends more time infusing in the larger container, you achieve a richer, more complex flavor.
- Easier Straining: Straining the fruit is simpler when transferring from a large container to bottles, reducing mess.
- Consistent Carbonation: Conducting F2 in a larger container can result in more even fermentation and carbonation in F3.
Cons of F2 in a Larger Container:
- Longer Process: This method takes longer, as you’re adding an extra step before bottling.
- Less Carbonation During F2: The larger container means less trapped CO2, resulting in less carbonation during this phase. However, carbonation will increase during F3.
- More Equipment: You’ll need an additional container and possibly an airlock, which could be a downside if you’re limited on space or budget.
How to Maintain Carbonation in a Larger Container During F2
If you’re concerned about losing carbonation during F2 in a larger container, here are some tips to keep the fizz alive:
1. Use an Airlock
An airlock allows carbon dioxide (CO2) to escape during fermentation while keeping oxygen out, helping to build up some carbonation in your F2 container.
2. Seal the Container Tightly
If your F2 container has a secure lid, seal it tightly to trap more CO2, creating a more carbonated environment similar to bottles.
3. Add a Small Amount of Sugar or Juice
Adding a small amount of sugar or juice before sealing the container gives the yeast more fuel to produce CO2, boosting carbonation.
4. Shorten the F2 Time
Keep F2 in the larger container short, around 1-2 days, before transferring to bottles for F3. This balances flavor infusion with carbonation.
5. Stir or Shake Gently Before Bottling
Stirring or shaking the larger container before bottling helps distribute yeast and bacteria evenly, promoting even fermentation and carbonation in F3.
6. Use Smaller Containers for F2
Consider using smaller containers for F2 to trap more CO2, similar to the bottling process.
7. Bottle Earlier
Bottle the kombucha while it’s still slightly active during F2 to capture fizz and boost carbonation during F3.
Step-by-Step Guide to Kombucha Second Fermentation
For beginners, here’s a step-by-step guide on conducting the second fermentation (F2) and third fermentation (F3):
1. Know When F1 is Complete
F1 is ready when the kombucha tastes tangy but still slightly sweet, usually after 7-14 days depending on temperature and taste preferences. The pH should be between 2.5 and 3.5.
2. How Much Fruit to Add
Add about 1 cup of chopped fruit per quart of kombucha during F2. Adjust based on the strength of flavor you desire.
3. Monitor Carbonation
Check carbonation levels by burping the bottles daily during F2. This helps prevent explosions and lets you monitor the fizz.
Safety Tips for Kombucha Fermentation
Managing Pressure
During F2, pressure can build up quickly, especially in sealed bottles. Burp the bottles daily to avoid explosions.
Signs of Spoilage
Kombucha that has gone bad may develop mold (fuzzy, blue, green, or black spots) or an off smell. Discard the batch immediately if this occurs.
Tools and Equipment for Kombucha Brewing
Best Bottles for F2/F3
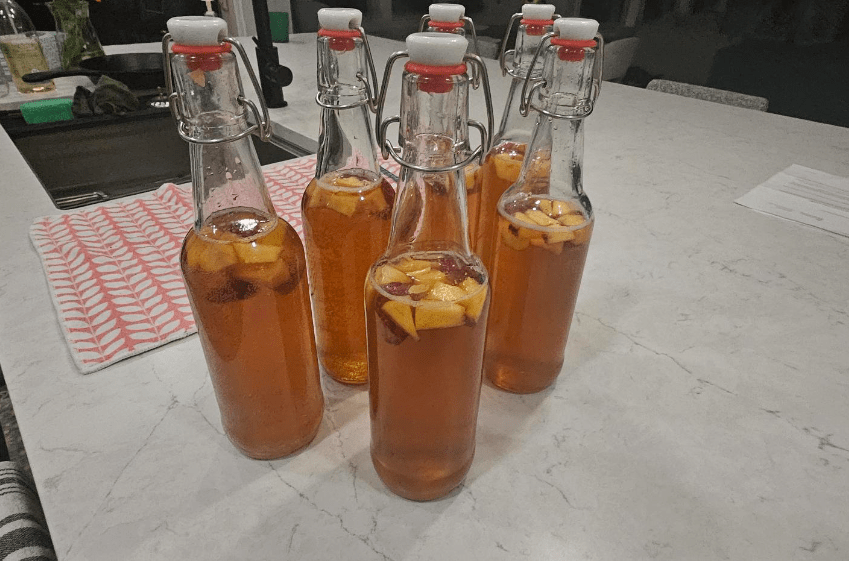
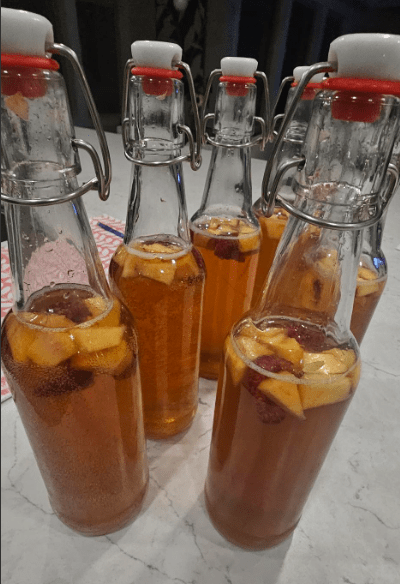
Flip-top bottles are ideal for F2 and F3 as they seal well for carbonation. Mason jars work for F2 but may not hold carbonation as effectively in F3. I use these swing top glass bottles from amazon, they are the same ones you see in the picture below. They have worked great for me.
Using an Airlock
An airlock allows gases to escape while keeping air out, typically used during F2 in larger containers. You might be interested in “securing your brew” article. I use these wide mouth fermentation jars with airlocks that come with it.
What to Expect During Kombucha Fermentation
Taste and Texture Changes
Kombucha should taste tart and slightly sweet after F2. The fruit may soften and lose flavor over time, but this is normal.
Troubleshooting Fizz Issues
If your kombucha isn’t carbonating, add a small amount of sugar or juice before bottling, and ensure bottles are sealed tightly.
Storing Kombucha After Fermentation
How Long to Keep Kombucha After Bottling
Once bottled and refrigerated, kombucha can last for several weeks. Fruit will slowly break down, so it’s best to consume it within 1-3 weeks for optimal flavor.
How to Store Kombucha
Store bottled kombucha in the refrigerator to slow down fermentation and preserve flavor. Keep bottles upright to prevent leaks.
Experimenting with Kombucha Flavors
Popular Flavor Combinations
Mix fruits like strawberries and basil, blueberries and lavender, or ginger and lemon for exciting flavors. Spices like cinnamon or cloves add a unique twist.
Keeping a Brewing Journal
Track your experiments by keeping a brewing journal. Note the fruits used, fermentation time, and results to refine your process.
Understanding Kombucha Fermentation
What Happens During F2
During F2, yeast and bacteria continue to consume fruit sugars, producing CO2 and acids. This creates the fizzy, tangy beverage we love.
The Importance of pH
Kombucha’s low pH prevents harmful bacteria growth, ensuring a safe brew. Measure pH with strips or a digital meter for accuracy.
Frequently Asked Questions About Kombucha
1. Can I use frozen fruit for F2?
Yes, frozen fruit works well for F2. It may break down faster but is great for infusing flavor when fresh fruit isn’t available.
2. What if my kombucha isn’t sweet enough?
Add a small amount of sugar or juice during F2 if your kombucha isn’t sweet enough. Be careful not to add too much, as excess sugar can lead to over-carbonation.
3. Can I mix different types of fruit in one bottle?
Absolutely! Mixing fruits like berries and citrus creates unique, delicious flavor combinations.
4. What should I do if my kombucha doesn’t carbonate?
If your kombucha isn’t carbonating, try adding a little more sugar or juice before bottling and ensure bottles are sealed tightly. Warmer temperatures during F2 can also boost carbonation.
Glossary of Kombucha Brewing Terms
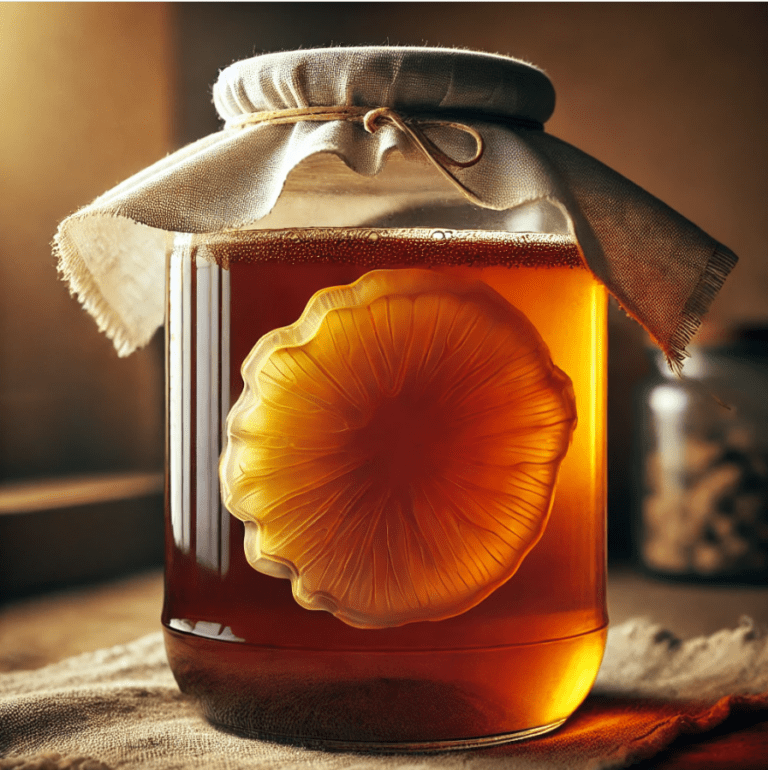
- SCOBY: Symbiotic Culture Of Bacteria and Yeast, the living culture that ferments sweet tea into kombucha.
- F1: First fermentation, where sweet tea is fermented by the SCOBY into kombucha.
- F2: Second fermentation, where flavors (like fruit) are added and the kombucha is sealed to create carbonation.
- pH: A measure of how acidic or basic a solution is. Kombucha’s pH should be between 2.5 and 3.5 for safety.
- Anaerobic: An oxygen-free environment, which is created during the sealed F2 process to produce carbonation.
Final Thoughts
Brewing kombucha is a fun and creative process, especially as you experiment with flavors and techniques. By following these tips and understanding the basics, even beginners can brew delicious, bubbly kombucha at home. If you are wondering how my raspberry and nectarine brew came out, i’m not sure yet, the fruits still sitting and infusing. I had to write this article the same night as i bottled it so i did not forget!