How to Make a SCOBY 101 for Kombucha 2024: The Ultimate Guide to Growing and Troubleshooting Your SCOBY
Whether you’re a kombucha enthusiast or just starting your fermentation journey, understanding the SCOBY is key to crafting that perfect brew. The…
Whether you’re a kombucha enthusiast or just starting your fermentation journey, understanding the SCOBY is key to crafting that perfect brew. The SCOBY, also known as the pellicle, is the living culture that drives the fermentation of kombucha. This comprehensive guide will walk you through everything you need to know about SCOBYs—from what they are to how to make one.
What is a SCOBY?
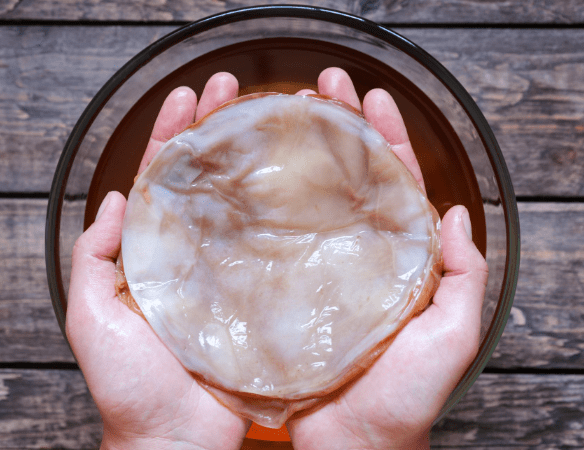
The term SCOBY stands for Symbiotic Culture Of Bacteria and Yeast. It’s the living, rubbery disc that fuels the fermentation process in kombucha, turning sweet tea into a tangy, effervescent drink loaded with probiotics. A SCOBY is like the heart of your kombucha, working tirelessly to produce that unique flavor and fizz we all love.
But what exactly is it? The Pellicile is a cellulose structure produced by bacteria during fermentation. It acts as a seal to protect the kombucha from airborne contaminants, while the yeast inside ferments the sugars in the tea.
How to Make a Kombucha SCOBY from Scratch
Making your own SCOBY might sound daunting, but it’s surprisingly simple. Whether you’re starting from a store-bought bottle of kombucha or a friend’s Pellicile, here’s how you can grow your own:
Ingredients:
- 1 cup of strong starter kombucha (unflavored, unpasteurized)
- 1 cup of sugar
- 8 cups of water
- 4 bags of black or green tea
- A large glass jar (at least 1 gallon capacity)
Steps:
- Brew the Tea: Boil the water, add the tea bags, and let them steep for about 10 minutes. Remove the tea bags, and stir in the sugar until fully dissolved.
- Let the Tea Cool to Room Temperature: This step is critical! Allow the sweetened tea to cool completely to room temperature (around 68-72°F / 20-22°C). Adding the starter kombucha to hot tea can kill the beneficial bacteria and yeast, ruining the fermentation process before it even begins.
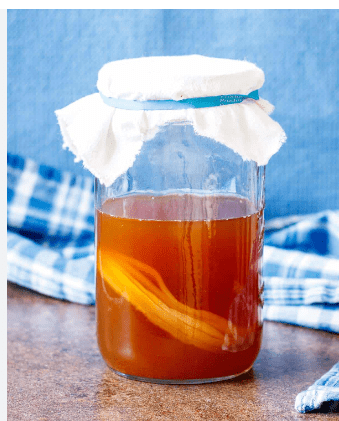
- Mix in Starter Kombucha: Once the tea has cooled, pour it into your large glass jar, leaving some space at the top. Add the starter kombucha to the jar.
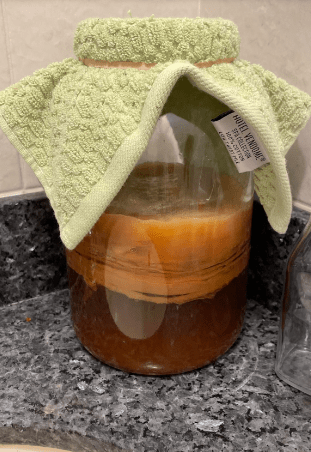
- Cover and Ferment: Cover the jar with a coffee filter or cloth secured with a rubber band to keep out dust and bugs while allowing airflow. Place the jar in a warm, dark place (around 75-85°F / 24-29°C) and let it sit undisturbed.
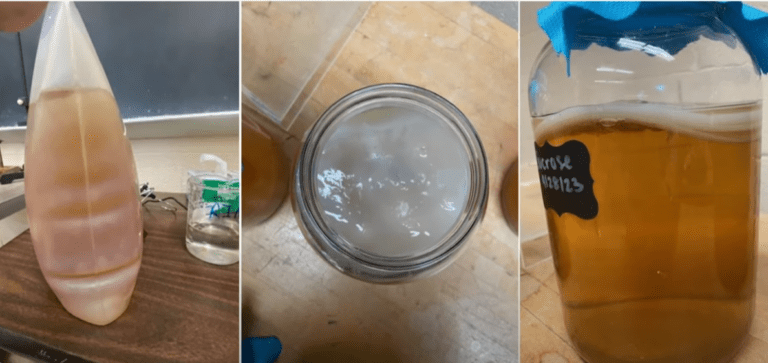
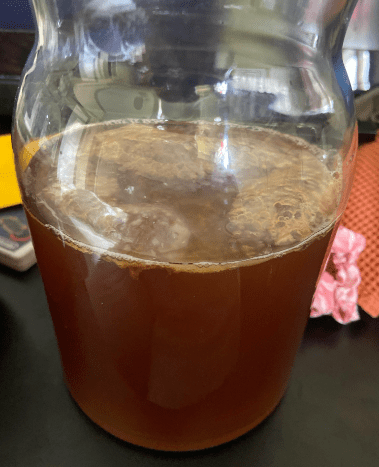
- Wait for the SCOBY to Form: After about 1-4 weeks, a new Pellicle will start to form on the surface of the liquid. It will gradually thicken over time.
Why the Variation in Time?
The time it takes for a SCOBY to fully form can vary due to several factors:
- Temperature: Warmer environments (closer to 85°F / 29°C) will speed up the fermentation process, allowing the SCOBY to form in as little as 1 week. Cooler temperatures (closer to 75°F / 24°C) will slow down the process, potentially taking up to 4 weeks. If your room temperature fluctuates, consider using a heating mat or placing your jar in a consistently warm area, like on top of the fridge.
- Starter Kombucha Strength and Acidity: The potency and pH level of the starter kombucha significantly influence the formation time of a SCOBY. A strong, well-fermented starter with a low pH (typically between 2.5 and 3.5) provides an acidic environment that is ideal for the bacteria and yeast to thrive. If the starter kombucha is less acidic (higher pH), the SCOBY may take longer to form, and there’s a greater risk of contamination. Tip: Use pH strips or a digital pH meter to monitor the acidity of your brew. If the pH is too high, you may need to extend fermentation time or consider using a stronger starter kombucha.
- Tea and Sugar Quality: The nutrients in your tea and sugar also play a role. Using high-quality tea (black or green) and fresh sugar ensures the yeast and bacteria have the resources they need to grow the SCOBY efficiently.
- Airflow and Humidity: Proper airflow and a stable, moderately humid environment contribute to faster and healthier SCOBY development. A poorly ventilated area or extreme humidity fluctuations can slow down the process.
Once the SCOBY is about ¼ inch (0.6 cm) thick, it’s ready to use in brewing your kombucha!
What to Do with Extra SCOBYs
As you continue brewing, you’ll accumulate more SCOBYs than you need for your batches. Here are a few options for managing extra SCOBYs:
- SCOBY Hotel: Store your extra SCOBYs in a “SCOBY hotel”—a jar filled with kombucha where you can keep them alive and healthy for future use.
- Gifting: Share your extra SCOBYs with friends or family who want to start brewing their own kombucha.
- Composting: SCOBYs are biodegradable and can be added to your compost pile.
- Craft Projects: Some people use dried SCOBYs in arts and crafts, like making leather-like materials.
Can You Eat a SCOBY? Exploring the Edible Side of Kombucha
Yes, you can eat a SCOBY! While its jelly-like texture might not be everyone’s favorite, it’s actually packed with probiotics, fiber, and a variety of nutrients that are beneficial for gut health. Here are a few ways people have incorporated SCOBYs into their diet:
- Blend it into smoothies: Some kombucha fans add small pieces of SCOBY to their smoothies for an extra probiotic boost.
- Make SCOBY jerky: Dehydrating Pellicle with spices can create a chewy, tangy snack similar to jerky.
- SCOBY candy: Cooking SCOBY in a simple syrup and then drying it out can result in a unique, sweet treat.
Supporting Information
- Nutritional Benefits: SCOBYs are rich in fiber and contain beneficial bacteria, making them similar to other fermented foods in terms of promoting gut health.
- Texture and Taste: The taste of a SCOBY is often described as tangy and sour, with a gummy or leathery texture, which can be off-putting unless prepared creatively.
- Community Insights: On the Kombucha subreddit, users share various ways to eat SCOBYs, from making jerky to blending them into smoothies. However, many agree that the texture is an acquired taste, and preparation is key to making it enjoyable.
Common SCOBY Problems and How to Fix Them
Brewing kombucha isn’t always smooth sailing. Sometimes, issues like mold on your SCOBY can arise, leaving you wondering if your brew is doomed. Let’s address some of the most common SCOBY problems and how to fix them.
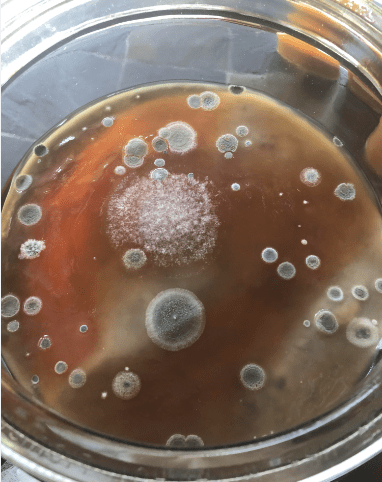
Mold on SCOBY
Mold is a kombucha brewer’s worst nightmare. If you see fuzzy, blue, black, or green spots on your Pellicle it’s mold—not to be confused with the normal, bumpy texture or brown strings that might hang from it. Unfortunately, if mold appears, you’ll need to discard both the SCOBY and the batch of kombucha. Mold is harmful and can contaminate your entire brew.
How to Prevent Mold:
- Sanitize Equipment: Ensure that all your brewing equipment is thoroughly sanitized before use. This includes your jar, utensils, and even your hands.
- Maintain Proper Temperature: Keep your brewing environment within the optimal temperature range (75-85°F / 24-29°C). Avoid drafts and direct sunlight.
- Acidic Starter: Use a strong, acidic starter kombucha to lower the pH quickly and discourage mold growth.
Weak or Thin SCOBY
If your Pellicle is too thin, your kombucha may not ferment properly. This can happen if your brewing environment is too cold, if the tea used didn’t contain enough nutrients, or if the starter kombucha was weak.
How to Thicken Your SCOBY:
- Adjust the Temperature: Move your jar to a warmer location to encourage better growth.
- Use High-Quality Tea: Ensure you’re using real tea (black, green, or oolong) with ample nutrients, as herbal teas do not provide the necessary elements for a strong SCOBY.
- Add More Sugar: Ensure your tea has enough sugar, as this is what the yeast and bacteria will consume to grow.
SCOBY Sinking
A sinking SCOBY is usually nothing to worry about. New SCOBYs often float to the top, while older ones might sink to the bottom. As long as there’s no mold or other signs of contamination, your kombucha is likely fermenting properly. The position of the SCOBY in the jar doesn’t affect the quality of the kombucha; it’s just a natural part of the brewing process.
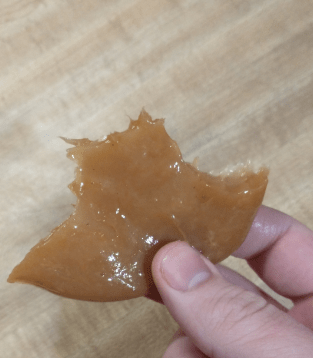
SCOBY Texture Changes
Over time, you might notice changes in the texture or color of your SCOBY. It may develop brown, stringy bits, or uneven layers. These are normal and are often a result of yeast activity during the fermentation process. However, if your SCOBY becomes excessively discolored (e.g., black or green), this could indicate contamination, and it’s safest to discard the batch and start over with a fresh SCOBY.
Off Smells
Kombucha should have a tangy, vinegar-like smell. If your brew develops an off-putting odor—like rotting eggs, cheese, or something putrid—this is a strong sign of contamination. Trust your nose; if something smells wrong, it’s better to err on the side of caution and discard the batch.
Conclusion
SCOBYs are the backbone of kombucha brewing, and by understanding how to grow, maintain, and troubleshoot them, you’re well on your way to mastering the art of kombucha. Whether you’re making your own SCOBY from scratch, experimenting with SCOBY recipes, or dealing with common issues, this guide provides all the information you need to succeed.
Remember, brewing kombucha is both an art and a science. Don’t be afraid to experiment, learn from each batch, and enjoy the process. Happy brewing!